

Palette Knife Mountain Cake
The mountains are calling…
How to create a colorful mountain landscape with Colour Mill edible food colors.

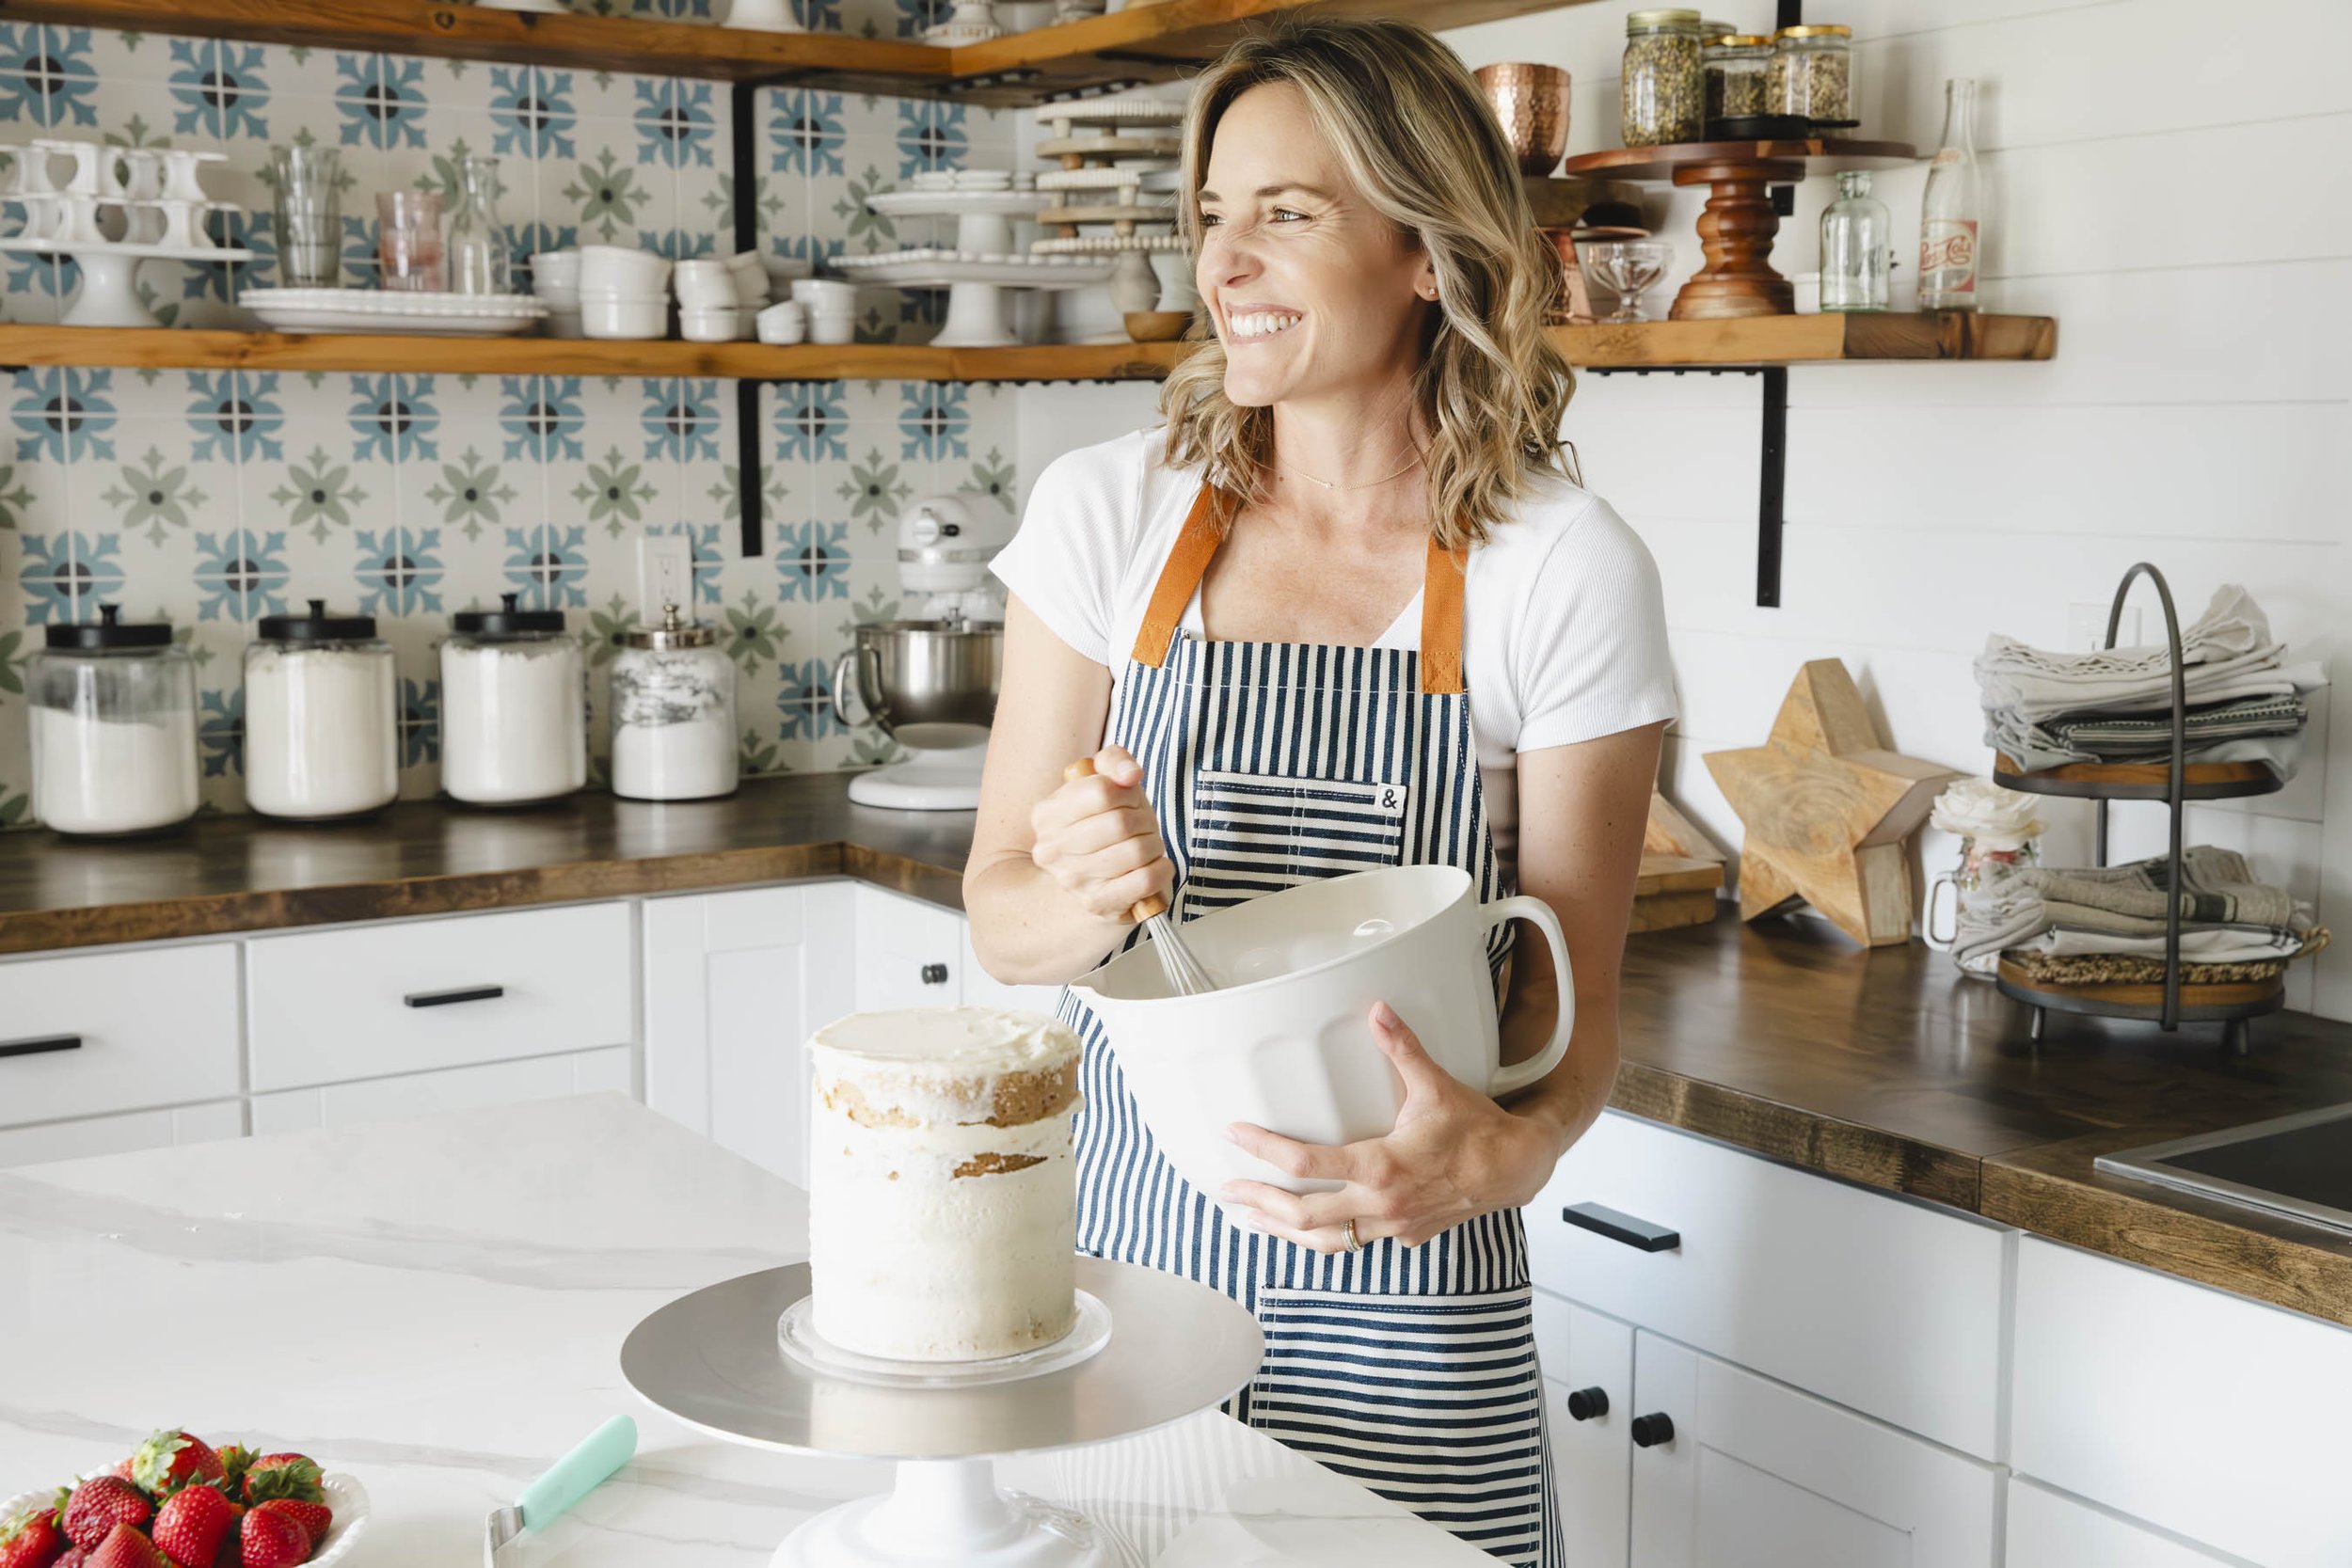
The adventure begins! Let’s get out of our heads and into the mountains, where lines are uneven, texture is a love language, and beauty is in the imperfections. I’ve partnered with Colour Mill to bring you a palette knife painted mountain cake tutorial. We’re sharing the tools, set up, and my helpful tips for success. If you’ve been following me you’ve gathered the mountains and Mother Nature inspires my work. My most requested cake design is the mountain landscape. It’s adventurous, rustic, and best of all, wanderlust inspiring. But what I love most about this style is that it’s easier to accomplish than you may think. The journey begins with Colour Mill and their beautifully curated collection of organic and earthy colors.
Even as a novice cake decorator, this style is fun and approachable, but you’ll need the right tools to accomplish the job. Below is a list of items that are a worthy investment towards building your skills. Most of these can be easily found on Amazon or your local craft store. The Colour Mill tools and oil based colors can be found on the Colour Mill website.
Tools
Revolving Cake Stand for decorating.
Cake Scraper to smooth the buttercream exterior. The scraper featured is made by Colour Mill.
Offset Spatula to apply the buttercream base.
One batch of American buttercream or preferred buttercream. Make enough buttercream to cover the cake with extra to mix the color palette. The amount depends on the size of your cake. The cake featured is a four-layered 7” round cake. It used roughly 2 cups of buttercream to coat the exterior and 1 cup to make the color palette.
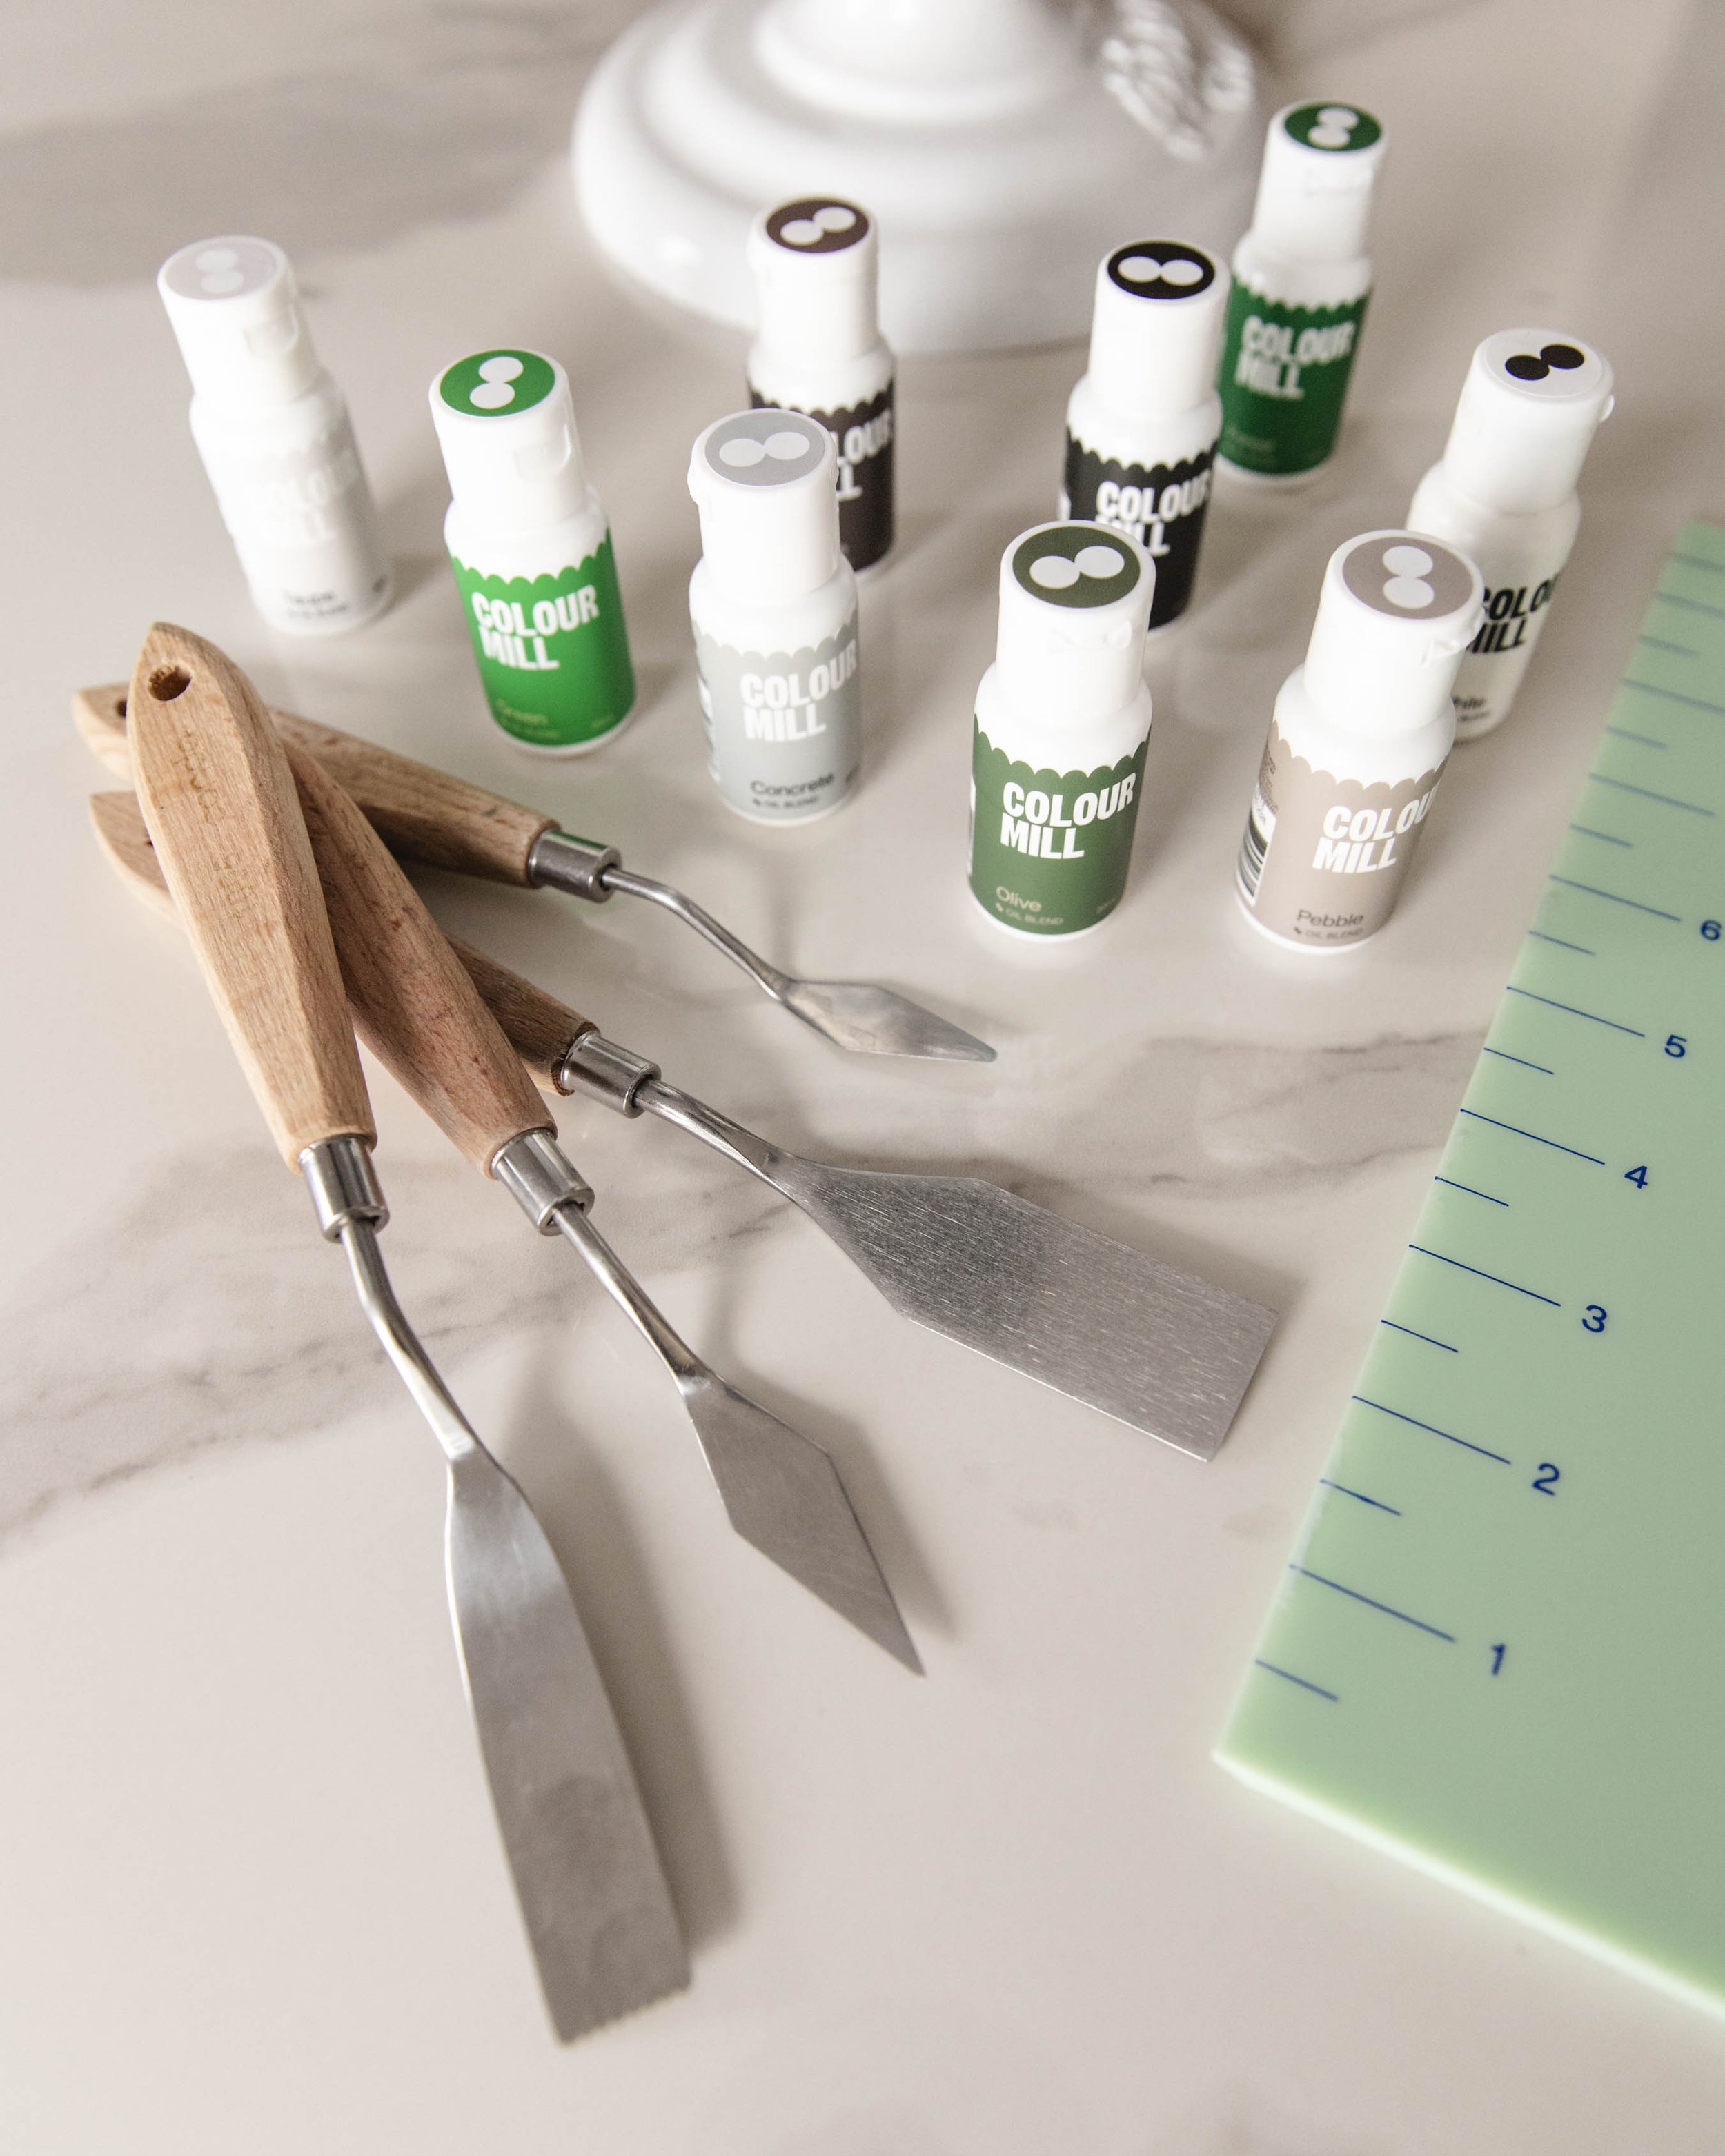
Metal Palette Knives. One with an angled edge and one with a square edge.
Flat Metal Baking Sheet to mix the color palette.
Paper Towels to clean the palette knives.
Refrigerator to chill the cake between paintings.
Colour Mill oil-based tints in: Denim, Mango, White, Taupe, Concrete, Coffee, Pebble, Black, Olive, Forest, and Green
These colors are simply a suggestion. As you practice and master this style, I encourage you to customize the landscape and color palette to your liking.

Color mixing tips
Colour Mill tints will deepen the longer they rest, therefore, mix the color palette first for more control over the saturation. Keep in mind, color can always be added but not taken away. Rather than mixing the colors in bowls, use a flat metal baking sheet. This works much like an artist’s palette board, making it easy to blend colors together and scrape them up with the palette knife. Start with 1-2 tablespoons of buttercream with 1-2 drops of color. Using the square edge palette knife, mix and wait 10 minutes. Add 1-2 drops more if you want a deeper color. If a color feels too bright add a teeny tiny drop of its contrasting color to tone it down. A contrasting color is the color’s opposite on the color wheel. For example, red is a contrast to green, yellow is a contrast to purple, orange is a contrast to blue. If the blue is too bright add a teeny tiny drop of orange to balance it out. After mixing the color palette, gently cover the baking sheet with plastic so the buttercream doesn’t crust over. Set aside until ready to use.
Palette Knife Painting Tips
Always begin with a chilled buttercream surface. To paint with a palette knife, hold the knife at a 30°- 45° angle to the side of the cake. Gently drag the palette knife to apply the color. To cover a large surface area, generously load the bottom of the palette knife with buttercream. To add details and highlights, use less buttercream, focusing on one side of the knife edge for accuracy of placement. To add dimension, use more buttercream, dragging the knife in different directions. To create texture, gently tap your knife in buttercream, lightly coating the bottom. Using the bottom of the knife, flat against the buttercream exterior, gently dab and lift. This pulls the buttercream up from the surface creating texture. To add a crisp edge, generously coat the bottom of the palette knife, heavier on one edge. Holding the knife at a 30° angle, with the loaded side on top, firmly push the knife in and down in a slight swooping motion. Use paper towels to clean your palette knife in between steps.

Step One: Mix the Color Palette
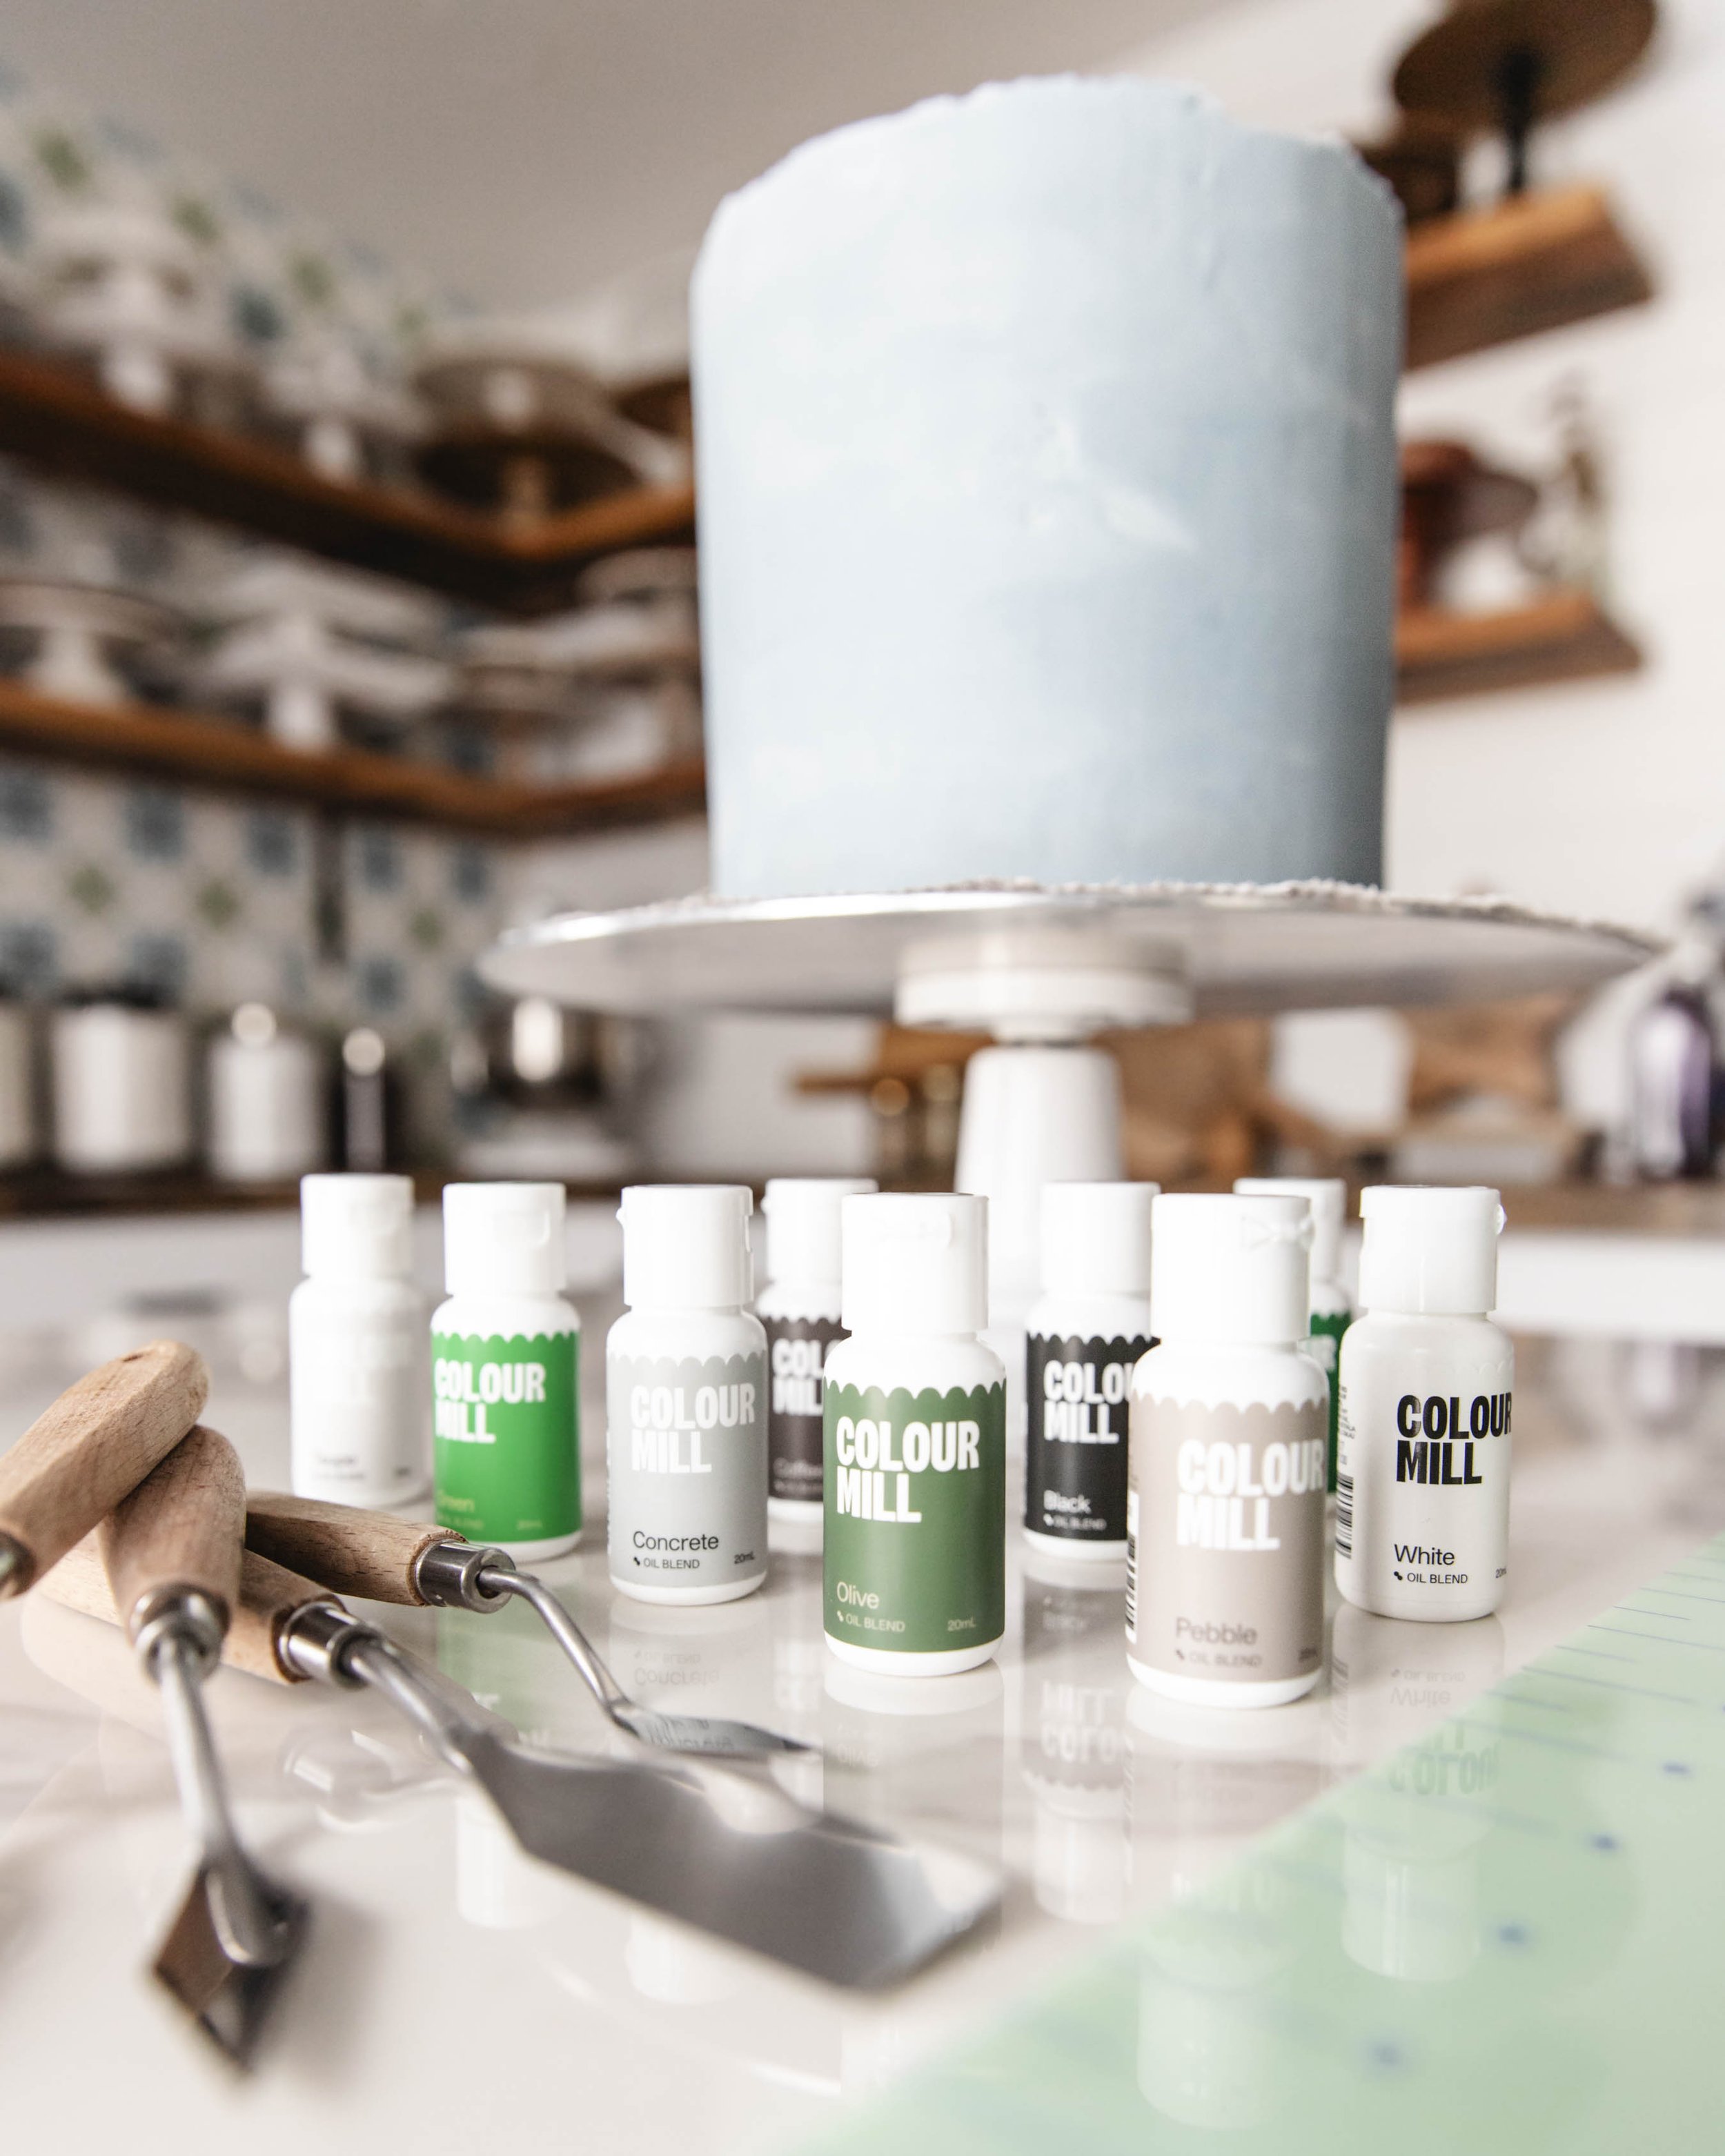
Begin by mixing the Denim blue base color for the cake exterior. In a medium bowl, add 3-4 drops of Denim to roughly 2 cups of buttercream. This will create a soft blue backdrop. If desired, tone down the Denim with a tiny drop of Mango. Set aside. On a flat metal baking sheet, mix the mountain landscape color palette. Work with 1-2 tablespoons of buttercream for each color. Mix 2 drops of White with 1 drop of Taupe. For the remaining colors, add 2-3 drops of each: Concrete, Coffee, Pebble, Black, Olive, Forest, Green, and White. If a deeper color is desired add 1-2 drops more. Set aside.
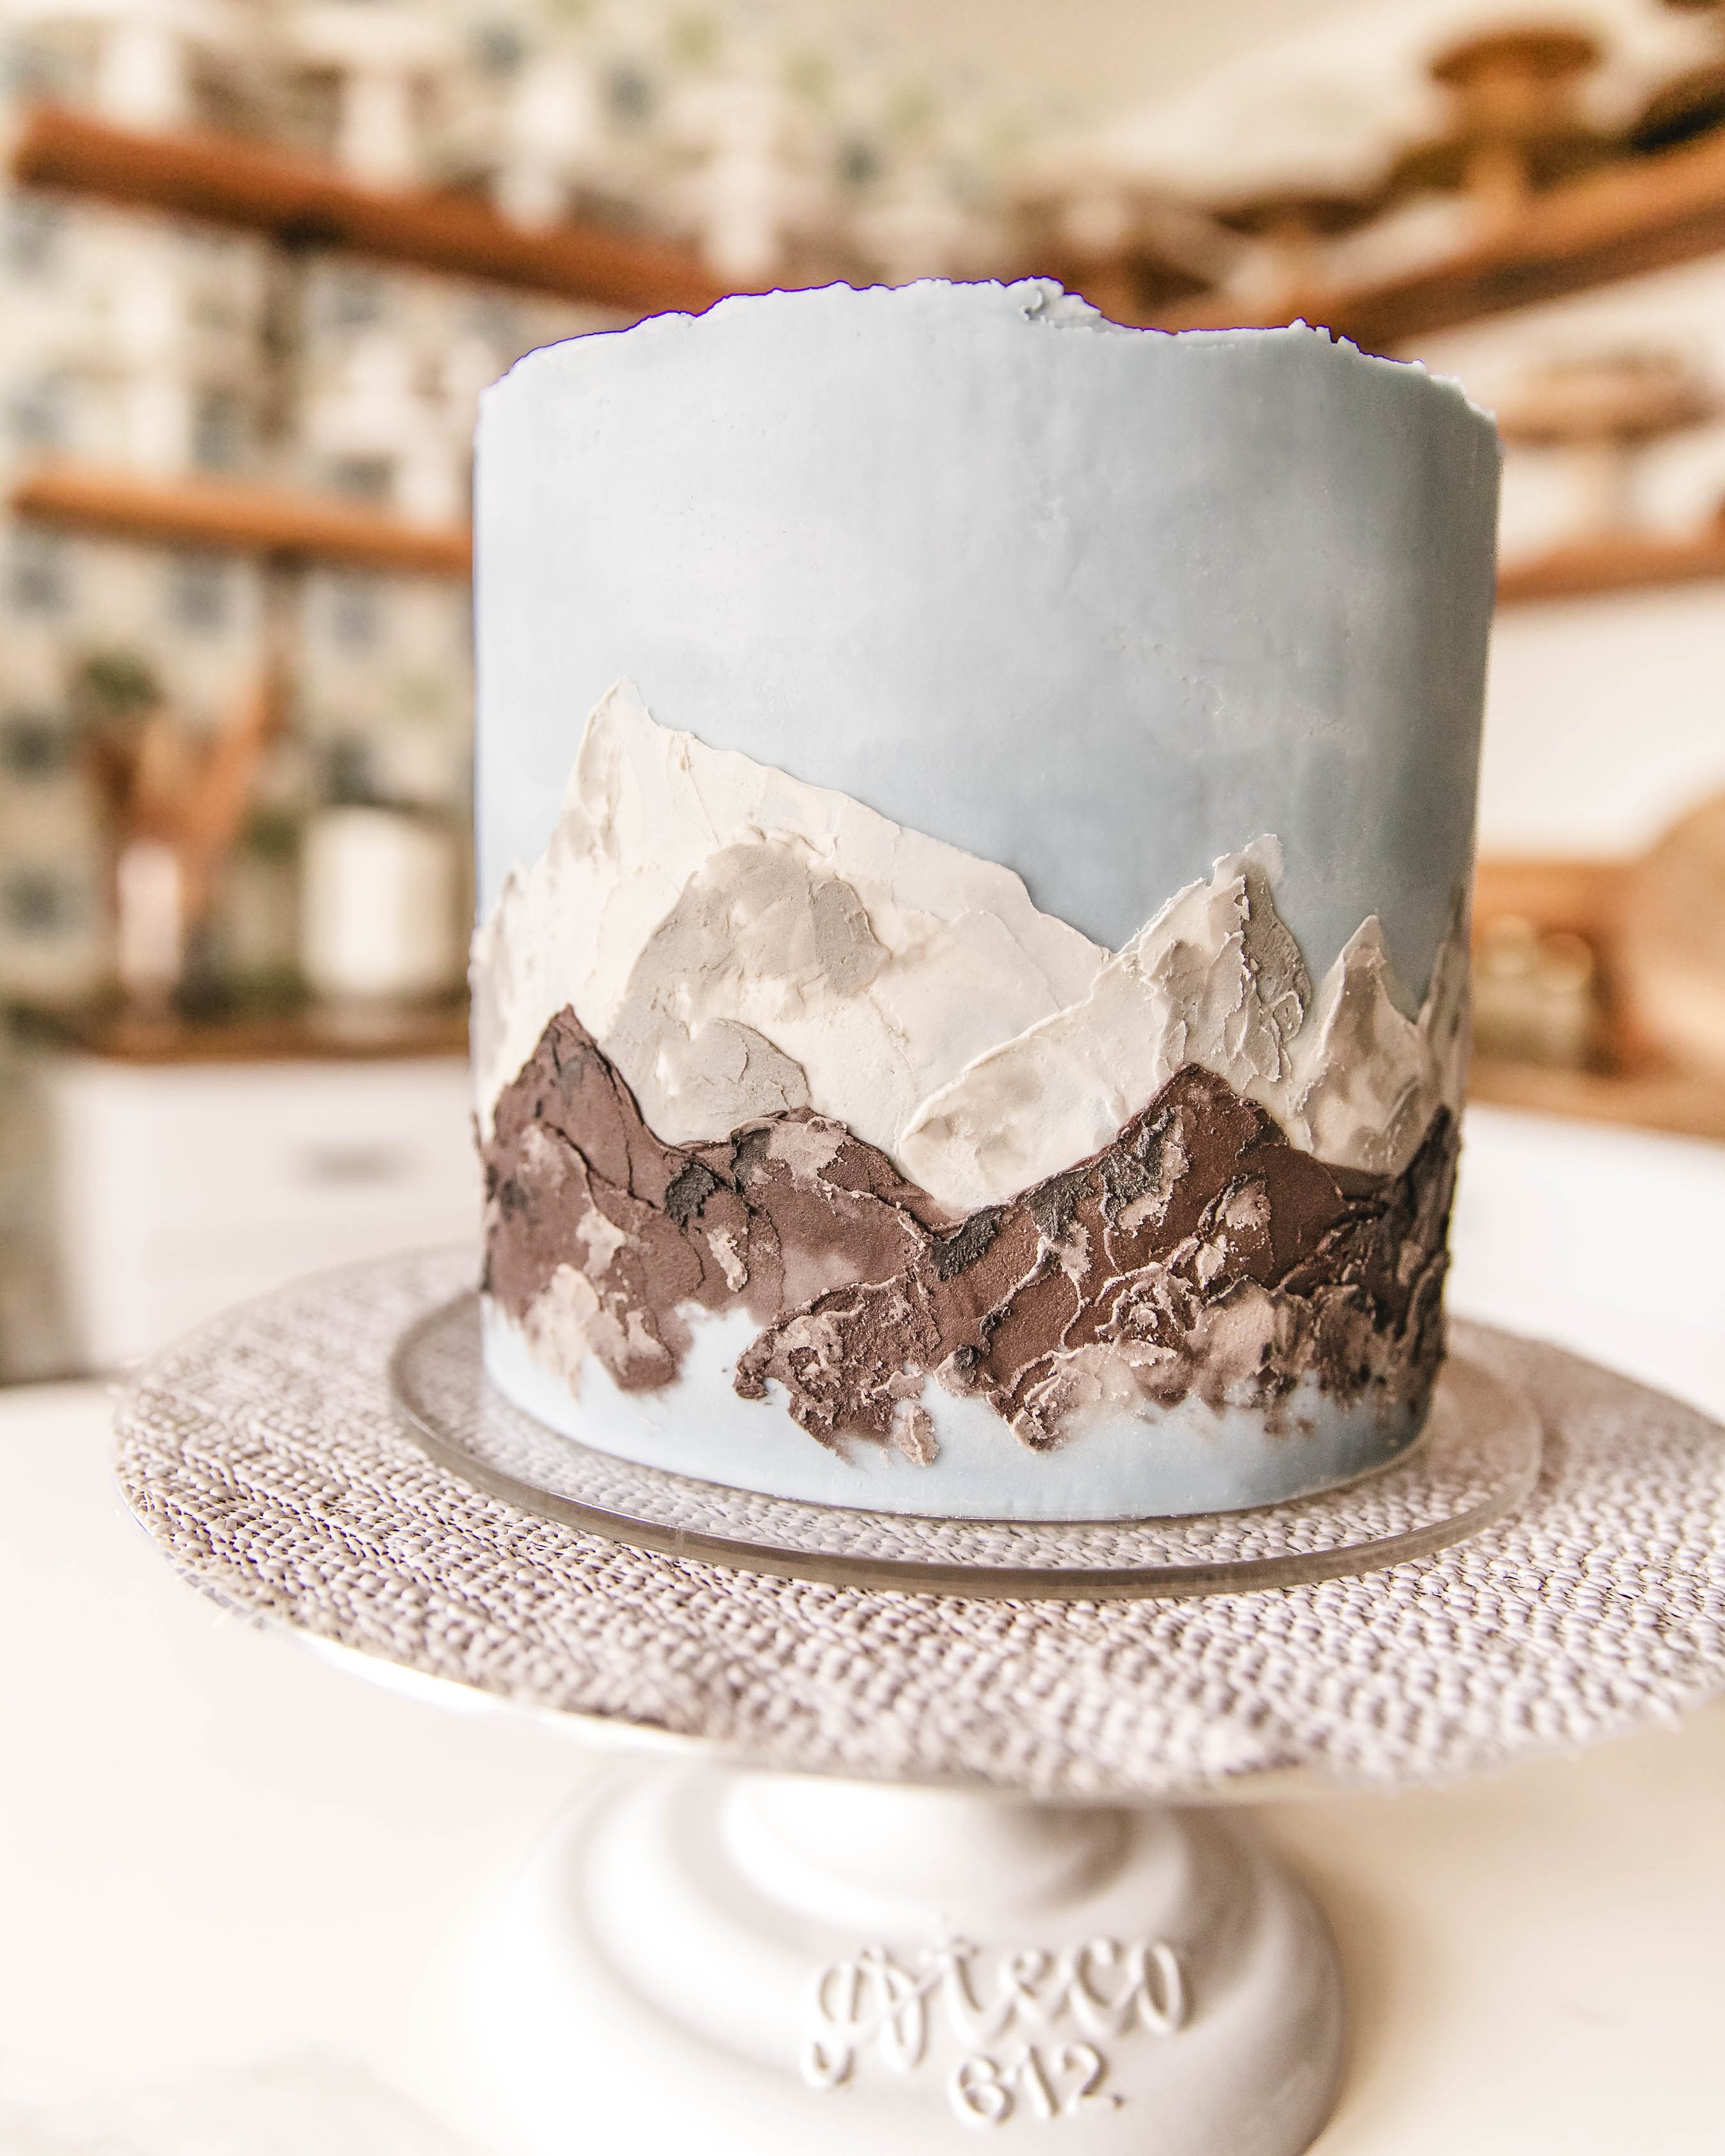
Step Two: Sky
Using an offset spatula, add the Denim base buttercream to the crumb coated, chilled cake. Start at the top and smooth over the side in an even layer to fully coat the cake. Use the cake scraper to smooth the sides. Rather than smoothing the top edge, keep the top edge uneven to add to the rustic element of the design. Chill the cake for 15-20 minutes until the buttercream is firm.

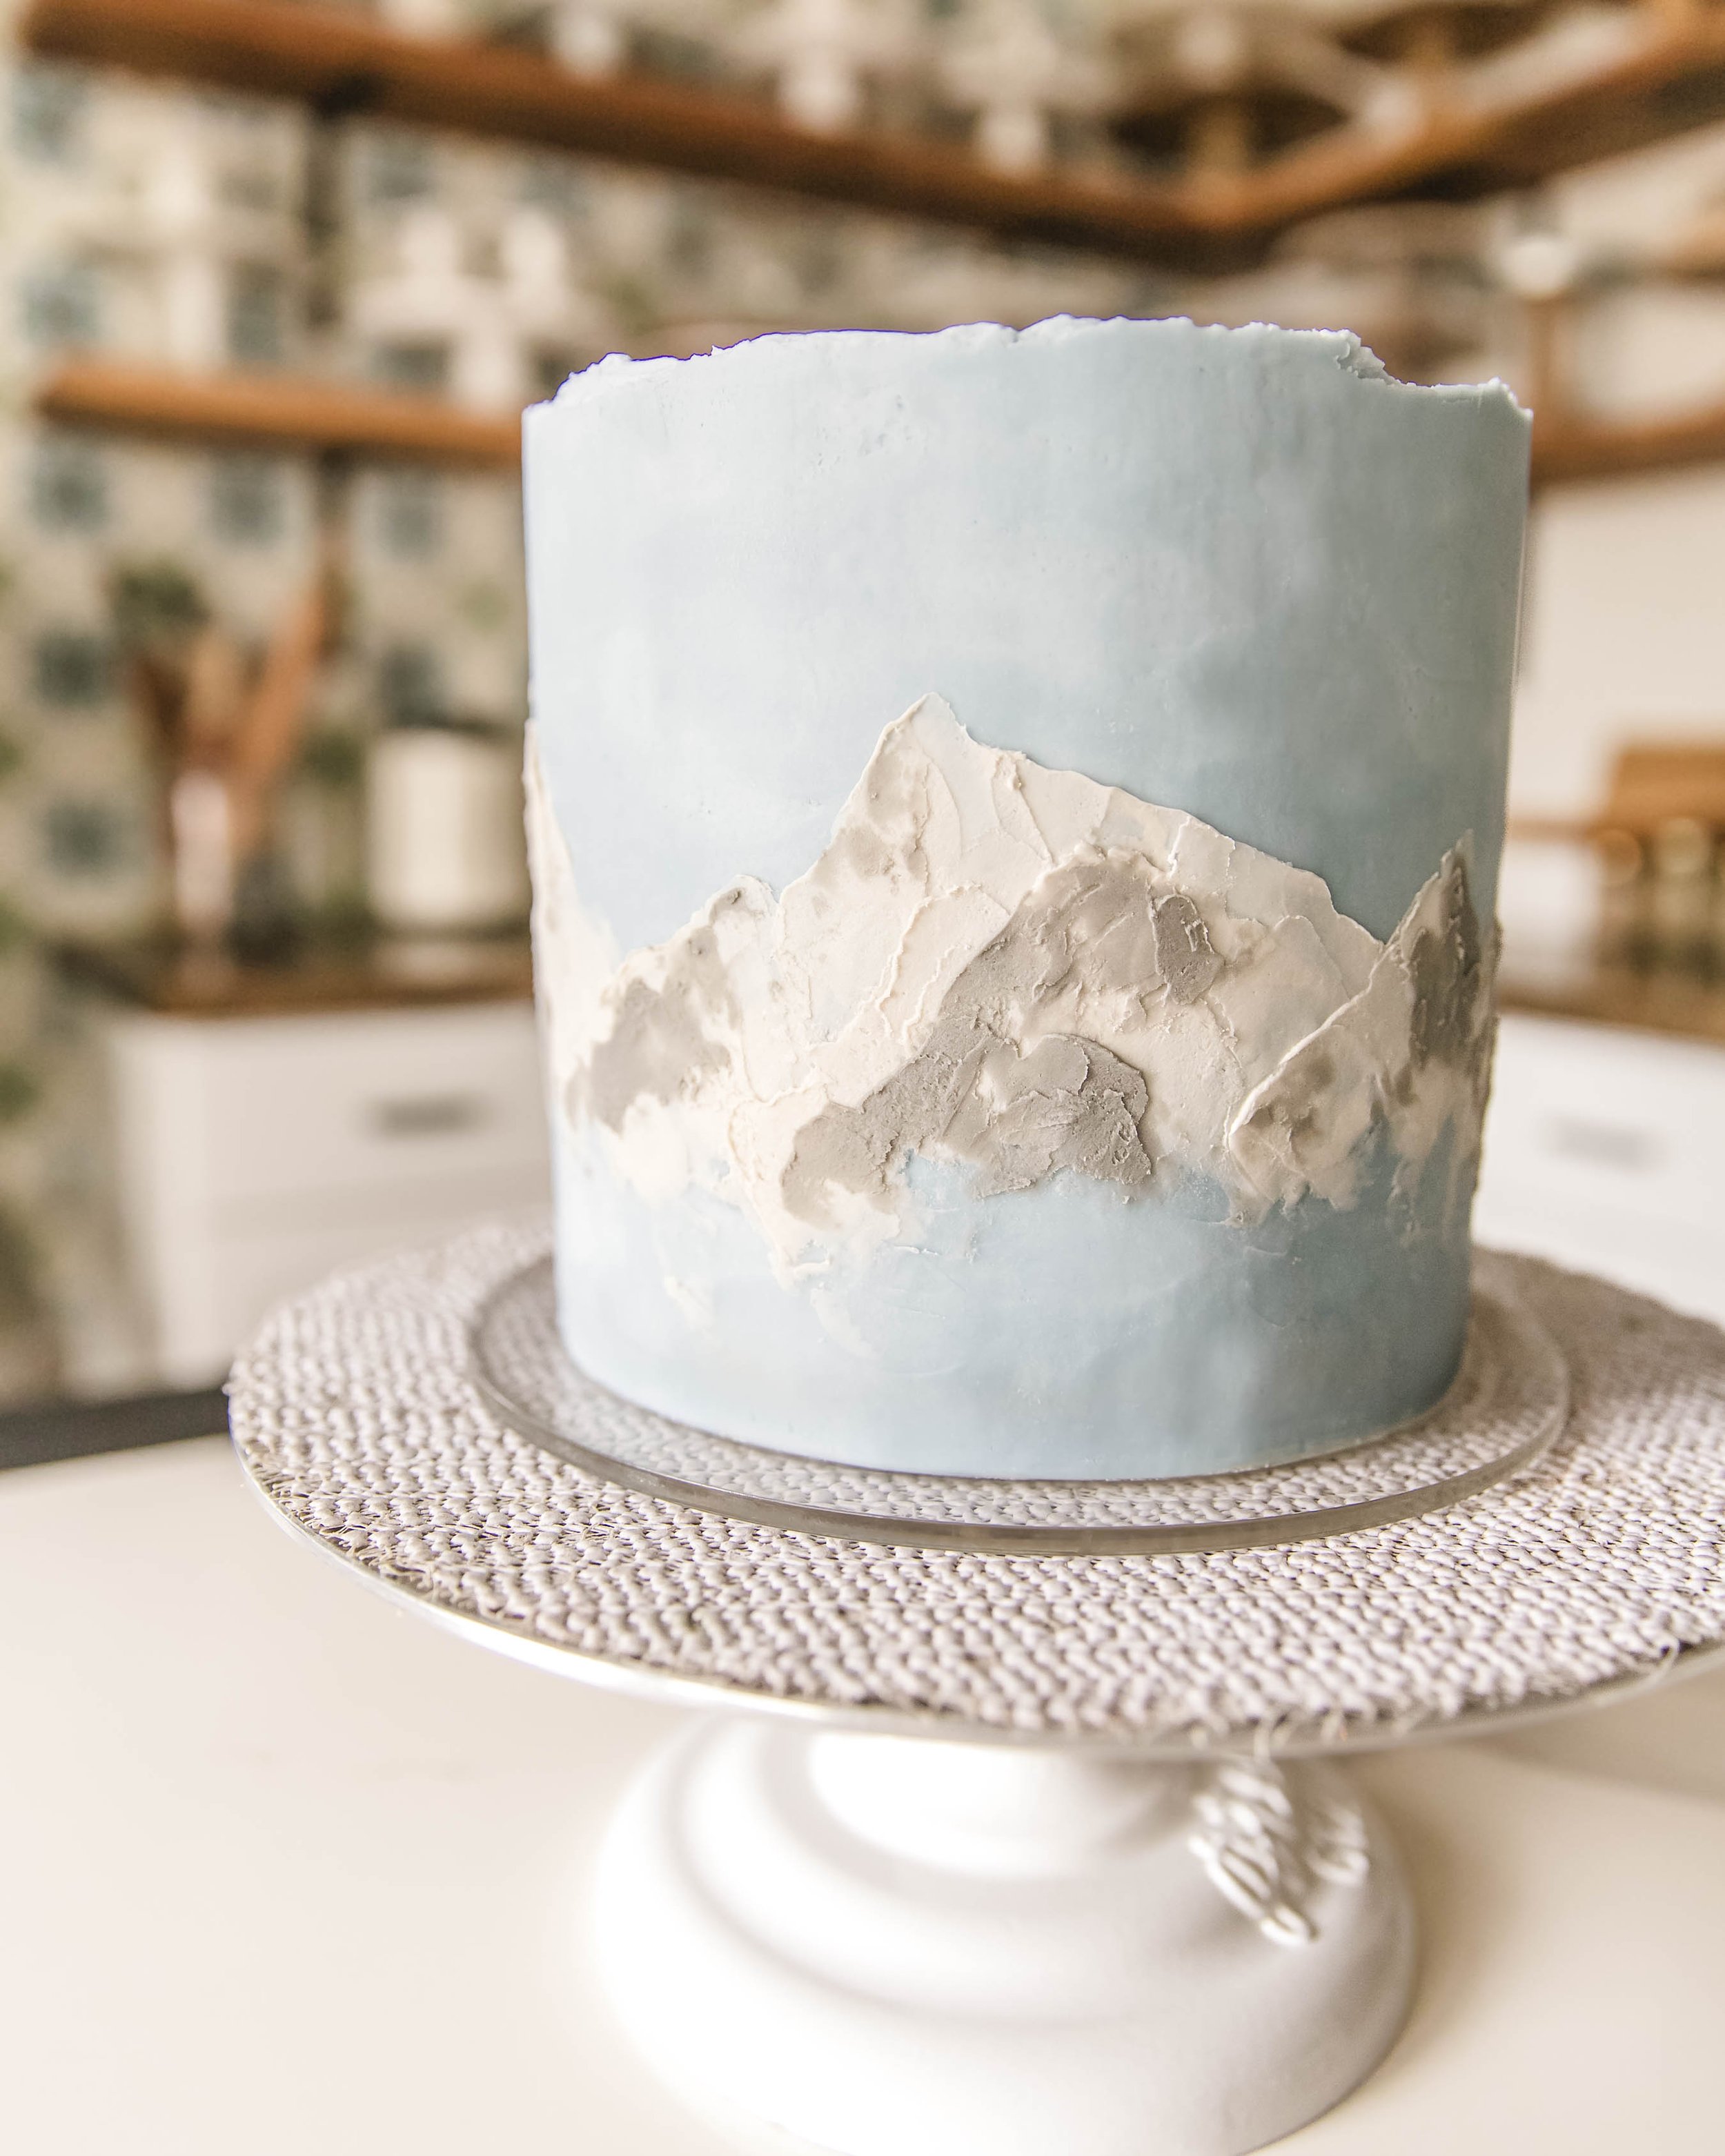
Step Three: Snowy Mountains
Starting about 2/3 up the cake, begin building the snowy mountain layer. Scrape a generous amount of the White and Taupe mixed buttercream onto the bottom of the angled palette knife. Using the edge of the knife as a natural guide for the mountains, begin to apply the buttercream to create the mountain landscape. Drag and pull the knife in opposite directions to create different mountain heights, adding edges and texture here and there. Paint the mountains about 2/3 down the cake. Wipe the palette knife clean. Chill the cake for 10 minutes. Scrape a thin layer of concrete buttercream onto the bottom of the palette knife. Using small swipes, add highlights, dimension, and texture to the mountains, focusing on the peaks and edges. Wipe the palette knife clean. Chill the cake for 10 minutes.
Step Four: Rocky Mountains
Starting at the base of the snowy mountains, begin building the rocky mountain layer. Scrape a generous amount of Coffee buttercream onto the bottom of the angled palette knife. Using the angled edge of the knife as a natural guide for the mountains, begin to apply the buttercream to create the mountain landscape. Drag and pull the knife in directions to create different mountain heights, adding edges and texture here and there. Paint the mountains down the cake, leaving roughly 1” at the bottom. Wipe the palette knife clean. Chill the cake for 10 minutes. Scrape a thin layer of Pebble buttercream onto the bottom of the palette knife. Using small swipes, add highlights, dimension, and texture to the painted mountains, focusing on the peaks and edges. Wipe the palette knife clean. Chill the cake for 10 minutes. Scrape a thin layer of Black buttercream onto the bottom of the palette knife. Repeat the highlights, texture, and dimension. Wipe the palette knife clean. Chill the cake for 10 minutes.
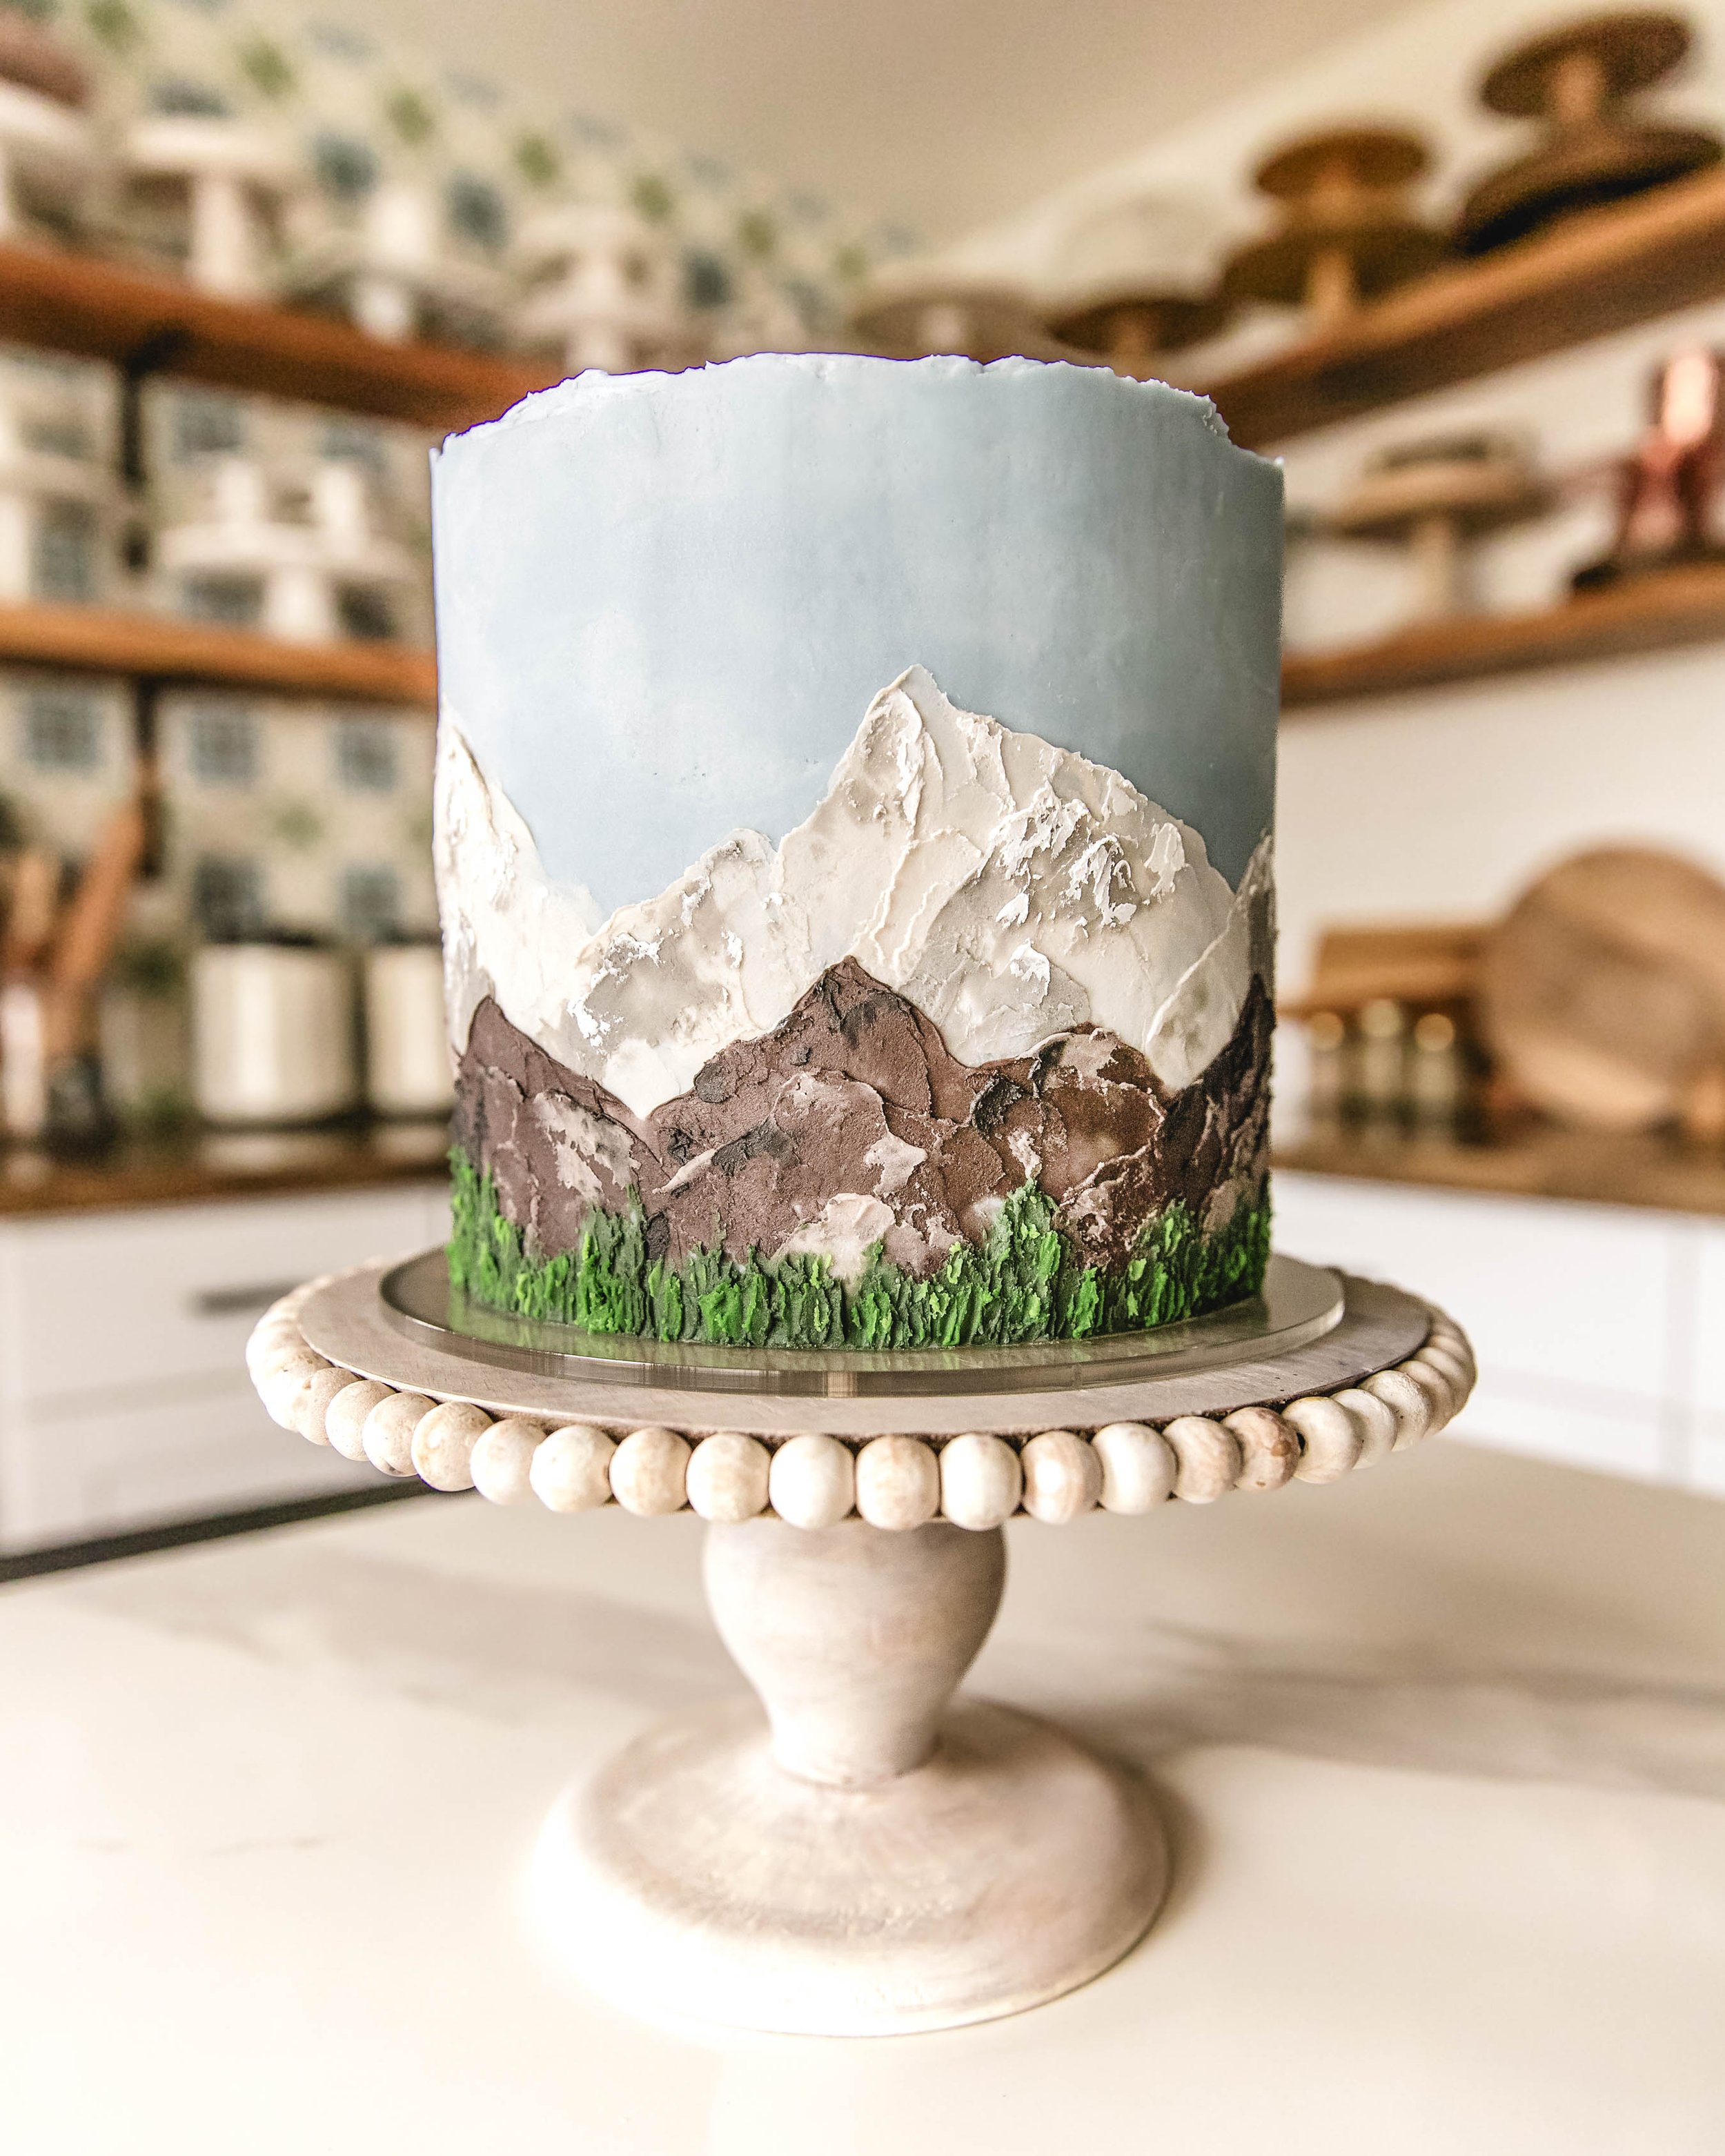
Step Five: Trees
Starting at the bottom of the cake and working upward to the rocky mountains, begin building the tree layer. Scrape a generous amount of Olive buttercream onto the bottom of the square edge palette knife, focusing on the tip of the knife. Holding the knife vertical, with the square edge facing down, gently swipe the buttercream upward till it meets the bottom of the rocky mountain layer. Use the edge corners of the knife to pull the buttercream upward so it’s textured and uneven, to resemble the look of tree tops. Continue around the base of the cake. Scrape a small amount of Forest buttercream onto the bottom of the angled palette knife, focusing on the tip of the knife. Holding the knife vertical, swipe the buttercream from the bottom upward, here and there. Repeat these steps with Green buttercream. Chill for 10 minutes.
Step Six: Snowy Highlights
Scrape a small amount of White onto the bottom of the angled palette knife. Using small swipes, add highlights, dimension, and texture to the painted mountains, and trees if desired, focusing on the peaks and edges. Chill the cake for 10 minutes or until ready to serve.

I hope you enjoyed learning this process. Remember, Mother Nature isn’t perfect with her designs. She doesn’t stress and neither should you. Palette knife painting is about being wild and free, just like the great outdoors. Enjoy.


